
Container door seals
Container door seals are the thin line of rubber that stands between your cargo and the elements. These extruded rubber profiles — often called container door gaskets, rubber door seals, or container weather stripping — run along the perimeter of shipping container doors and create a compression barrier that prevents water, dust, pests, and outside air from entering the container interior. When they work, they are invisible. When they fail, the consequences range from condensation-damaged goods to complete cargo write-offs.
Definition: A container door seal is an extruded rubber profile, typically made from EPDM (Ethylene Propylene Diene Monomer), fitted into a metal retaining channel around the door perimeter of an ISO shipping container to form a weather-tight compression barrier when the doors are closed and locked.
This guide covers every dimension of this critical component — from the chemical structure that makes EPDM the industry standard, through the taxonomy of seal types and profiles, to diagnostic tests, replacement procedures, and what the future holds for container sealing technology.
What Are Container Door Seals and How Do They Work?
Where Did Container Door Seals Come From?
The story of container door seals begins, as much of the container shipping industry does, with Malcolm McLean. In 1956, McLean’s converted tanker Ideal X carried 58 containers from Newark to Houston, launching the intermodal revolution. But those early containers were not standardized, and their sealing systems were rudimentary — often little more than simple rubber strips glued or tacked to door edges. Leakage was common, and cargo damage from water ingress was accepted as a cost of doing business.
The turning point came with the development of ISO 668 (which standardized container dimensions) and ISO 1496 (which specified testing and sealing requirements for freight containers). As containers became globally interchangeable across ships, trains, and trucks, the door seal had to evolve from a simple weather strip into an engineered component capable of surviving decades of salt spray, equatorial UV exposure, Arctic cold, and the constant mechanical stress of door openings and closings at ports around the world.
The J-type seal profile — named for its J-shaped cross-section — emerged as the global standard during the 1970s and 1980s, driven largely by the dominance of Chinese container manufacturers like CIMC. The material of choice quickly converged on EPDM rubber, whose resistance to ozone, ultraviolet radiation, and temperature extremes made it dramatically superior to the natural rubber compounds used in earlier decades. Today, a container door seal is a precision-extruded, dimensionally stable component manufactured to tolerances measured in millimeters, with multiple profile variants tailored to different container types, door configurations, and performance requirements.
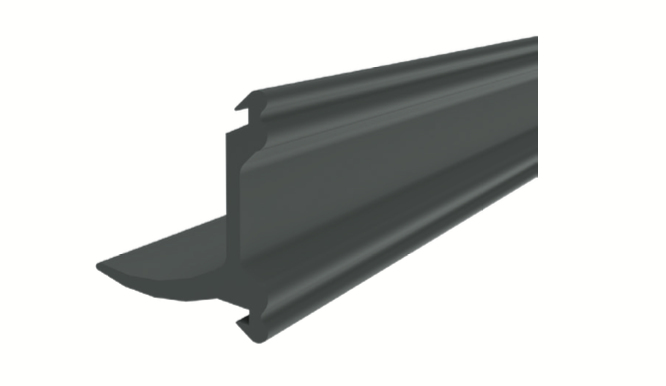
What Is the Basic Mechanism of a Container Door Seal?
A container door seal works on a straightforward compression principle. When the container doors close and the locking bars are engaged, the rubber seal profile is compressed between the door panel and the door frame. This compression creates a continuous, deformable barrier that fills the gap between the metal surfaces. Because rubber is elastic, it exerts a constant outward force against both surfaces, maintaining the seal even as the container flexes during transport.
The seal alone cannot do the job, however. The mechanism depends on a specific door-closing sequence that is built into ISO container design. The left-hand door (when viewed from outside, facing the doors) must close first. The right-hand door then closes over it. To enforce this order, the right-hand door is fitted with an overlap plate — a vertical metal flange that prevents the right-hand door from closing before the left. This overlap plate is the reason why the two doors require different seal configurations: a three-sided seal on the left-hand door and a four-sided seal on the right-hand door.
The seal itself sits inside a metal retaining strip (or retaining channel) that runs around the door’s edge. The retaining strip holds the seal profile firmly in place, preventing it from being pulled out when the door opens or from shifting under compression. Stainless steel rivets — typically 4.8mm x 15mm, 304-grade — secure the retaining strip to the door frame at regular intervals. The seal profile slides or is pressed into this retaining channel, and in many modern designs, internal metal clips within the rubber grip the channel edges for additional security.
When the locking bars are engaged and the cams press against the door frame, the entire door assembly is pulled tight. The rubber seal compresses by approximately 25–30% of its original thickness, creating the water-tight, air-tight barrier that protects the cargo inside.
What Materials Are Container Door Seals Made From?
The overwhelming majority of container door seals are manufactured from EPDM rubber — Ethylene Propylene Diene Monomer. This synthetic elastomer has dominated the industry for decades, and for good reason. To understand why, it helps to look at what EPDM is at a molecular level.
EPDM is a terpolymer — a polymer formed from three monomers: ethylene, propylene, and a diene comonomer. The ethylene and propylene form a saturated polymer backbone (no double bonds), which is the key to EPDM’s extraordinary resistance to ozone and UV degradation. In contrast, natural rubber and many other synthetic rubbers have unsaturated backbones with carbon-carbon double bonds that are vulnerable to attack by ozone, causing the surface cracking that eventually destroys the material. The diene comonomer in EPDM provides the limited unsaturation needed for vulcanization (cross-linking), but the saturated backbone remains protected.
This molecular architecture translates into practical properties that are ideal for maritime and outdoor applications:
- Ozone resistance: EPDM can withstand years of exposure to atmospheric ozone without surface cracking — the dominant failure mode for natural rubber seals.
- UV resistance: The saturated backbone resists photo-oxidation from sunlight, maintaining structural integrity through years of equatorial and open-ocean UV exposure.
- Temperature range: Standard EPDM compounds maintain flexibility and sealing performance from -40°C to +120°C (-40°F to 248°F), covering everything from Arctic container yards to tropical shipping lanes.
- Water resistance: EPDM absorbs minimal water, with volume swelling typically under 5% even after 30 days of continuous immersion.
- Chemical resistance: Good resistance to mild acids, alkalis, and polar solvents such as water, alcohols, and glycols.
Typical EPDM specifications for container door seals include a hardness of 70 ±5 Shore A, tensile strength of 10 MPa, elongation at break of 300–600%, and a specific gravity of 1.2–1.35 g/cm³. These properties balance firm structural retention (so the seal stays in its channel) with sufficient flexibility to maintain consistent sealing pressure even when the door frame is not perfectly true.
| Property | EPDM Rubber | Silicone | Natural Rubber | Neoprene (CR) |
|---|---|---|---|---|
| Temperature Range | -40°C to +120°C | -60°C to +230°C | -50°C to +80°C | -35°C to +120°C |
| Ozone Resistance | Excellent | Excellent | Poor | Good |
| UV Resistance | Excellent | Excellent | Fair | Good |
| Tensile Strength | 10–15 MPa | 5–10 MPa | 15–25 MPa | 10–15 MPa |
| Tear Resistance | Good | Fair | Excellent | Good |
| Water Absorption | Very Low | Low | Moderate | Low |
| Cost (Relative) | $$ | $$$ | $ | $$ |
| Typical Lifespan (Coastal) | 7–10 years | 5–8 years | 2–4 years | 5–7 years |
| Compression Set | Low | Low | Moderate | Low-Moderate |
| Suitability for Containers | Ideal | Overkill / Costly | Unsuitable | Acceptable |
Silicone is sometimes discussed as an alternative. It offers superior extreme-temperature performance (particularly at the high end, up to 230°C) and marginally better initial UV resistance. However, silicone has lower tensile strength and tear resistance than EPDM, develops surface cracks after 3–4 years in aggressive maritime environments according to accelerated aging tests, and commands a 20–30% price premium. For the vast majority of dry cargo container applications, EPDM remains the clear cost-performance winner. Silicone sees niche use in some specialized reefer and high-temperature applications, but it has not displaced EPDM as the industry standard.
What Are the Different Types of Container Door Seals?
What Is a J-Type Container Door Seal?
The J-type seal is the most common container door seal profile in the world. Its name comes from its cross-sectional shape: viewed end-on, the profile resembles the letter “J,” with a curved outer lip that compresses against the door frame and a flatter base section that sits within the retaining channel. The J-type is the standard seal for ISO dry cargo containers — both 20-foot and 40-foot general purpose (GP) units and high-cube (HC) variants.
J-type seals are designed to withstand high compression loads (up to 10 MPa) and operate across the full temperature range of container service. They typically feature internal metal clips spaced within the rubber to grip the retaining channel without adhesive, though many installers supplement this mechanical grip with adhesive for added security.
Standard J-type seal sets come in two heights: 8’6″ (2,591mm) for standard containers and 9’6″ (2,896mm) for high-cube containers. The seal width varies by manufacturer and profile design, with common reference widths ranging from approximately 19mm to 88mm depending on the specific extrusion die used.
| Dimension | 20′ & 40′ GP Container | 40′ HC Container |
|---|---|---|
| Door Width (per leaf) | ~1,141 mm | ~1,141 mm |
| Door Opening Height | ~2,251 mm | ~2,556 mm |
| J-Type Seal Set Height | 8’6″ / 2,591 mm | 9’6″ / 2,896 mm |
| Seal Weight (per meter) | ~0.6 kg | ~0.6 kg |
| Complete Set Weight | ~6.6 kg | ~7.0 kg |
| Standard Material | EPDM, 70 ±5 Shore A | EPDM, 70 ±5 Shore A |
The J-type seal is available in multiple supply formats. Extruded lengths of 2.5m and 5m are stocked by distributors for sectional repairs. Pre-formed seal sets with vulcanized (thermally bonded) corners are available for full replacements on standard containers. Custom seal sets can be manufactured to any dimensions, with mitred corners thermally bonded — though these carry a minimum order quantity, typically 40 meters of extrusion.
What Is a C-Type Container Door Seal?
The C-type seal is so named because its cross-section resembles the letter “C.” It is less common than the J-type and is typically found either on the lower sections of containers using a “JC” combination (J-type on sides and top, C-type on the bottom rail) or on complete door seals for a minority of container designs.
The key distinction between J and C profiles is the direction and shape of the sealing lip. A J-type seal has a single curved lip that faces outward; a C-type has a more symmetrical C-shaped profile that can seal in both directions. C-type seals are sometimes preferred for bottom door edges because they handle vertical compression differently than J-types, though the performance difference is marginal in most applications.
An important practical note: because J and C profiles share similar base dimensions that fit into the same retaining channels, a C-type seal can be improvised from a J-type seal by cutting off the back section of the “J.” This field modification is common in repair scenarios where a C-type profile is unavailable but J-type stock is on hand.
What Are H-Type and Other Specialty Container Door Seals?
Beyond the J and C types, several other container door seal profiles serve specialized applications:
H-Type Seals: Named for their H-shaped cross-section, these profiles create a double-sealing barrier — two compression zones within a single extrusion. H-type seals are predominantly used on refrigerated (reefer) containers, where maintaining temperature differentials between the interior and exterior is critical. The double seal minimizes thermal bridging and moisture infiltration, helping the refrigeration unit maintain consistent internal temperatures with less energy consumption.
Compression Type Seals: These are cut from self-adhesive closed-cell EPDM or CR (chloroprene/neoprene) sponge sheets. Unlike J-type seals that fit into a metal retaining channel, compression seals are bonded directly to the door surface. They are more commonly found on offshore containers, storage containers, and customized container conversions than on standard ISO shipping containers. Compression seals require a different door design — the seal must be fitted on all four sides of both doors, and approximately 6mm of compression is needed all around to achieve a proper seal. The trade-off is that they reduce the door aperture height by 80-100mm.
Edge Type / Bubble Type Seals: Often described as “car door” type seals because of their resemblance to automotive door weatherstripping, these consist of a PVC/EPDM sponge bulb (the bubble) bonded to a steel carrier that grips the edge of a flat bar, RSA bar, or plate. They are pressed or malleted onto door or frame edges and cut to length. Edge seals are simple to install and replace, making them popular for non-ISO containers, enclosure panels, and custom door applications. They are not standard on ISO freight containers because they take up more clearance space than J-type seals, reducing the door aperture — a critical dimension for standardized cargo loading.
Foam Container Door Seals: The newest category, foam seals use closed-cell foam materials rather than solid rubber profiles. They offer custom sizing, good weatherproofing, and easier compression at lower door-closing forces. They are primarily used in storage and non-shipping container applications rather than in intermodal freight.
What Is the Difference Between 3-Sided and 4-Sided Door Gaskets?
This is one of the most frequently misunderstood aspects of container door seals, and it flows directly from the door-closing sequence described earlier.
On an ISO shipping container, the left-hand door (when facing the doors from outside) carries a three-sided seal. The gasket runs along three edges: the top horizontal edge, the bottom horizontal edge, and the hinge-side vertical edge. The fourth edge — the side where the two doors meet — has no seal. Instead, this edge is overlapped by the right-hand door’s overlap plate.
The right-hand door carries a four-sided seal. The gasket runs along all four edges: top, bottom, hinge side, and the lock-side vertical edge. The vertical seal on the lock side presses against the overlap plate, creating a continuous barrier across the door junction.
When you buy a container door seal gasket set, it always includes both components: one three-sided seal for the left door and one four-sided seal for the right door. If you open a container and see that the left door’s inner vertical edge has no rubber on it, you are not looking at a missing seal — you are looking at the correct three-sided configuration doing exactly what it was designed to do.
How Can You Tell If Container Door Seals Need Replacement?
What Are the Signs of a Failing Door Seal?
Container door seals do not fail suddenly. They degrade progressively through a combination of chemical, mechanical, and environmental mechanisms, and the signs are visible if you know what to look for:
Ozone Cracking: This is the most common failure mode for rubber seals. Ozone in the atmosphere attacks unsaturated polymer chains, creating microscopic surface cracks that grow over time. On EPDM — which is designed to resist ozone — cracking is slower than on natural rubber, but it does occur eventually, especially in high-ozone environments like coastal and industrial areas. Look for a network of fine, parallel cracks perpendicular to the direction of tension on the seal surface. Once cracking penetrates more than 1mm into the rubber, the seal’s ability to maintain compression is compromised.
Compression Set: This occurs when rubber loses its elasticity after being held in a compressed state for extended periods. Container doors that remain closed for months at a time are particularly susceptible. The telltale sign is a flat, shiny, or glossy spot on the seal where it contacts the door frame — the rubber has “set” into its compressed shape and no longer rebounds fully when the door opens. In testing, gaskets older than six years often fail to return to their original dimensions within 30 seconds of opening. If the seal surface looks polished and flat rather than matte and rounded, compression set has taken hold.
UV Hardening: Prolonged exposure to sunlight degrades the surface of rubber, causing it to become hard, brittle, and prone to cracking. While EPDM’s saturated backbone provides strong UV resistance, the surface can still harden over years of exposure, particularly on containers stored outdoors in high-sunlight regions. A hardened seal feels like rigid plastic rather than flexible rubber when you bend it backward.
Physical Damage: Tears, cuts, and punctures from forklift tines, cargo handling, or simply years of door operation are common. Even a tear as small as 25mm (1 inch) can break the continuous compression barrier and allow driven rain to penetrate. Look for cuts along the sealing lip, especially at door corners where stress concentrates.
Water Penetration Evidence: Rust trails or water staining on the interior face of the door frame or on the container floor near the doors are definitive evidence that the seal is no longer keeping water out. If you see light coming through the closed door from inside the container, the seal has failed or the door is misaligned.
According to the Container Owners Association, door sealing failures account for nearly 30% of all water damage claims in intermodal shipping. A proactive inspection approach — checking seals at least quarterly for containers in active service — is far cheaper than a single cargo damage claim.
How Do You Perform the Dollar Bill Test?
The dollar bill test (or paper slip test) is a simple, no-tool diagnostic that measures the clamping force of the door on the gasket. It is named for the US dollar bill, but any piece of standard-weight paper (approximately 80 gsm) works perfectly.
Step-by-step procedure:
- Close the container door completely and engage all locking bars and cams fully.
- Take a piece of paper and slide it between the gasket and the door frame at a point along the seal perimeter.
- Close the door on the paper so the paper is pinched between the seal and the frame.
- Try to pull the paper out.
Interpreting the results:
- Strong resistance — the paper tears or requires a firm tug: The seal is maintaining good compression at that point. No action needed.
- The paper slides out easily with little or no resistance: The seal is not being compressed enough to create a water-tight barrier at that location. If this occurs at a single point, it may indicate a warped door panel or misaligned hinge rather than a bad seal. If it occurs at multiple points along the perimeter, the gasket has likely lost its rebound capacity and needs replacement.
- The paper slides out freely on the hinge side only: This suggests the door hinges are worn and the door is not pulling in evenly. The seal may be fine; the hinge may need shimming or replacement.
For a more detailed assessment, the chalk test provides a visual map of seal contact. Apply a thin layer of chalk dust to the gasket’s contact surface, close and latch the door, then reopen it. The chalk transfer pattern on the door frame reveals exactly where the seal is making contact and where there are gaps. A continuous, unbroken chalk line around the entire frame indicates good seal integrity. Breaks in the chalk line indicate gaps where water, air, dust, and pests can enter.
How Often Should Container Door Seals Be Replaced?
There is no single answer that fits every container and every environment, but field experience and testing converge on a five-year guideline for containers in coastal or high-exposure environments. Accelerated aging tests show that EPDM maintains approximately 85% of its original elasticity after five years in coastal conditions — still functional, but approaching the point where safety margins shrink.
Several factors accelerate or extend this timeline:
- Climate: Containers in hot, sunny, coastal climates degrade fastest. Salt spray, high UV, and humidity combine to attack the rubber from multiple vectors.
- Usage frequency: Containers opened and closed daily experience more mechanical wear on seals than those opened once a month. Conversely, containers stored closed for years with tight latch pressure suffer more compression set.
- Container age and condition: Older containers with corroded retaining channels or misaligned doors place uneven stress on seals, accelerating localized failure.
- Seal quality: Not all EPDM compounds are equal. Higher-quality compounds with optimized cross-link density and plasticizer systems resist ozone, UV, and compression set better than budget alternatives.
The economics favor proactive replacement. A full seal set costs a fraction of a single water-damage cargo claim. Fleet operators who replace seals on a scheduled basis — every 5–7 years depending on operating conditions — report significantly lower cargo damage rates than those who replace only when visible failure occurs. The cost of the seal itself is typically the smallest component of the equation; the cost of installation labor and, more importantly, container downtime is where the real expense lies.
How Do You Replace Container Door Seals?
What Tools and Materials Do You Need?
Replacing container door seals is a manageable DIY task, but it requires the right preparation. Gathering all tools and materials before starting reduces the chance that a partially completed job will sit exposed to weather while you source a missing item.
Tools checklist:
- Utility knife with fresh, sharp blades — for cutting old seal sections and trimming new gasket to length
- Cordless drill with 3/16-inch (4.8mm) drill bit — for new rivet holes; match your rivet diameter exactly
- Flathead screwdriver — for prying old seal from the retaining channel
- Chisel — for tapping off stubborn fasteners and cleaning the channel
- Rubber mallet — for seating the new seal into the retaining channel without damaging the rubber
- Wire brush — for cleaning corrosion from the retaining channel before installation
- Clean rags — for solvent application and surface wiping
Materials checklist:
- Replacement door seal gasket set — including the three-sided left-hand seal and four-sided right-hand seal, matched to your container height (8’6″ or 9’6″)
- Neoprene contact cement — brush-on type, not spray-on, for better channel coverage. Standard rubber cement breaks down in cold temperatures; neoprene-based adhesive is required
- Stainless steel pop rivets — 4.8mm x 15mm, 304-grade (3/16″ x ~5/8″). These are the industry standard for container door seal retainers
- Replacement retaining strips — if the originals are corroded or damaged beyond reuse. 304 stainless steel retaining strips are the standard
- Acetone or isopropyl alcohol — for degreasing and cleaning the metal channel before adhesive application
- Cyanoacrylate adhesive (e.g., Permabond 105 or equivalent EPDM-compatible superglue) — for joining seal ends at corners during repairs
A critical preparation step that is often skipped: if the ambient temperature is below 20°C (68°F), the replacement gasket should be stored indoors at room temperature for at least 24 hours before installation. Cold EPDM rubber is stiff, difficult to stretch into corners, and prone to micro-cracking during installation. Installing rubber below its glass transition temperature can reduce service life by up to 50%.
How Do You Remove Old Container Door Gaskets?
Step 1 — Document the routing. Before you touch the existing seal, take photographs of every corner. Note where the seal ends meet — typically at the top center or top corner. These photographs are your reference for the new seal routing, especially at corners where the gasket makes a 90° turn.
Step 2 — Cut at the joint. Using your utility knife, cut through the old gasket at the point where the two ends join. This frees the continuous loop so you can pull it out section by section.
Step 3 — Remove the retaining strips. The old seal is held in place by metal retaining strips secured with rivets. Drill out the rivets (3/16-inch bit) and carefully remove the strips. If a retaining strip is in good condition — no significant corrosion, no deformation — set it aside for reuse. Stainless steel retaining strips can often serve through multiple seal replacements. If the strips are corroded, bent, or the rivet holes are elongated, replace them.
Step 4 — Pull the old gasket. With the retaining strips removed, the old gasket should pull out of the channel by hand. If it resists because of old adhesive, work a flathead screwdriver gently under the lip. Tap the screwdriver handle with the rubber mallet to break the adhesive bond along the channel — do not pry with brute force, as this can bend the metal retainer channel.
Step 5 — Clean the channel. This is the step most often rushed, and it is the one that determines whether your new seal stays in place. Use a wire brush to remove all rust scale from the retaining channel. Apply acetone or isopropyl alcohol to a clean rag and thoroughly wipe the entire channel to remove old adhesive residue, dirt, grease, and rust dust. Any adhesive lumps left in the channel will prevent the new gasket from seating at full depth. The channel must be clean, dry, and free of all contamination before the new seal goes in.
Step 6 — Inspect and treat. Examine the bare metal channel. If you find active rust, apply a rust converter before proceeding. Check door alignment: the gap between the door panel and the frame should be 3–5mm on all sides when the door is closed. If one side shows a larger gap, the hinges may be worn — shimming may be needed before the new seal is installed, because no gasket can compensate for a door that does not close square.
How Do You Install New Container Door Seals?
| Method | Description | Pros | Cons | Best For |
|---|---|---|---|---|
| Adhesive-Only | Gasket bonded into channel with neoprene contact cement | Clean appearance, no holes to drill | Adhesive can fail over time under lateral force; difficult to remove later | Compression-type seals, non-ISO doors |
| Rivet-Only | Retaining strips secured with rivets at intervals, no adhesive | Mechanically secure, proven long-term reliability | Requires drilling; retaining strips must be in good condition | J-type and C-type ISO container seals |
| Hybrid (Recommended) | Adhesive in channel plus retaining strips with rivets at 6-inch intervals | Maximum security; adhesive holds during installation; rivets provide long-term retention | Most labor-intensive | Full replacement on ISO containers, high-vibration applications |
Step 1 — Dry-fit the seal. Before applying any adhesive, position the new gasket in the channel without fastening it. Start at one corner, press the seal firmly into the channel, and work your way around the full perimeter. This confirms correct length, identifies any corner-fitting issues, and warms the rubber slightly through handling, making it more pliable.
Step 2 — Apply adhesive. Apply a thin, even coat of neoprene contact cement to both the cleaned retaining channel and the base of the gasket. Follow the adhesive manufacturer’s instructions for open time (the period you must wait before joining). For most neoprene contact cements, this is 5–15 minutes until the adhesive is tacky but not wet. The adhesive is a positioning aid, not a waterproofing layer — the compression of the rubber against the frame creates the seal.
Step 3 — Seat the gasket. Beginning at the top corner where the old seal’s joint was located, press the new gasket firmly into the channel. Work methodically along each edge. Use the rubber mallet to tap the seal into full depth — the sound will change from hollow to solid when the seal bottoms out in the channel. At corners, do not stretch the rubber; allow it to follow the natural turn radius of the channel.
Step 4 — Position retaining strips and drill. Place the retaining strips over the seal base. Using the existing holes (if reusing strips) or new locations, drill through the strip, the gasket base, and the door frame with the 3/16-inch bit. Space holes at approximately 6 inches (150mm) apart.
Step 5 — Install rivets. Insert a 4.8mm stainless steel pop rivet into each hole and set it with the rivet gun. The rivet head should compress the retaining strip firmly against the seal base without crushing the rubber.
Step 6 — Join the corners. If the seal set came with pre-formed vulcanized corners, the corner joints are already made. If you are using straight extruded lengths, the ends meeting at the corners must be joined. Apply a small amount of cyanoacrylate adhesive (EPDM-compatible) to the cut ends, press them together firmly, and hold for 30–60 seconds. The joint should be at a top corner where water is least likely to pool.
Step 7 — Test the installation. Close and latch both doors. Perform the dollar bill test at multiple points around each door. If any point shows low resistance, check whether the seal is fully seated at that location or whether a door alignment issue exists. If you performed the chalk test before the replacement, repeat it after installation to confirm uniform contact.
Can You Repair Container Door Seals Instead of Replacing Them?
Partial repair of a container door seal is possible, but it comes with limitations. Repairs are most appropriate when damage is isolated to a single section — for example, a tear at one corner caused by cargo impact — and the remainder of the seal is in good condition with no signs of widespread ozone cracking or compression set.
The repair procedure:
- Mark the damaged section clearly on the seal, with at least 25mm of margin on each side of the damage.
- Cut out the damaged portion with a sharp utility knife. Make clean, square cuts perpendicular to the seal axis.
- Clean the exposed channel in the repair zone with acetone, as you would for a full replacement.
- Measure and cut a replacement section from extruded J-type seal stock to the exact length of the removed section.
- Press the new section into the channel. Secure with the retained (or new) retaining strip and rivets at both ends of the repair — at least two rivets per side of the repair.
- Join the new section to the existing seal at both cut faces using cyanoacrylate adhesive. Hold each joint for 30–60 seconds.
- Apply a thin bead of neoprene contact cement along the joints for additional weather protection.
The risk of a partial repair is that it introduces two new joint points into the seal, each of which becomes a potential failure point over time. If the surrounding seal material is more than five years old or showing signs of ozone cracking, a full replacement is the more reliable — and ultimately more economical — choice. A repair that fails in six months costs you the same container downtime as a replacement that lasts another five years.
How Do Container Door Seals Prevent Common Problems?
How Do Seals Prevent Container Condensation?
Container condensation — sometimes called “container rain” or “container sweat” — is one of the most persistent and damaging problems in intermodal shipping and container storage. It occurs when warm, moisture-laden air inside the container cools below its dew point, causing water vapor to condense on the ceiling, walls, and cargo. The physics are simple: a container loaded in a humid tropical port and shipped to a cooler climate undergoes dramatic temperature swings, and the sealed metal box acts like a giant condensation chamber.
The role of the door seal in this equation is critical but often misunderstood. A properly functioning seal does not prevent condensation directly — condensation is driven by internal humidity, not by external water entering. What a seal does prevent is the continuous ingress of additional moisture-laden outside air into the container. When a seal fails, even partially, warm humid outside air enters the container through the gap. When temperatures drop, that moisture condenses. The process can cycle daily: warm daytime air enters, night-time cooling condenses it, and the cycle repeats. Over days or weeks, the accumulated moisture can saturate cargo, cause mold growth, and corrode metal goods.
The 60% relative humidity threshold is widely cited as the point where cargo damage risk escalates significantly. Below 60% RH, most goods remain stable. Above 60% RH, mold growth accelerates and corrosion rates increase. A failed door seal that allows ambient air (often 70–90% RH in coastal and tropical environments) to continuously enter can push a container’s internal humidity well above this threshold within hours.
The dollar bill test and chalk test described earlier are as much condensation-prevention diagnostics as they are water-ingress tests. A container that passes these tests has a seal system capable of maintaining a stable internal microclimate, which is the first line of defense against condensation.
It is worth noting that seals are only part of a condensation prevention strategy. Ventilation (passive vents or active systems), desiccants, and anti-condensation coatings on the container ceiling all play roles. However, none of these measures can compensate for a failed seal that is actively admitting outside air.
What Happens When Container Door Seals Fail?
The consequences of seal failure cascade from minor inconvenience to major financial loss:
Water Ingress: The most immediate and visible consequence. Driven rain, spray, and standing water enter through gaps in the seal. Cargo packed against the doors — a common loading practice — is the first to get wet. Paper products, textiles, electronics, and steel goods are all highly sensitive to water damage.
Pest Infiltration: Insects, rodents, and other vermin can enter through surprisingly small seal gaps. Once inside, they nest, breed, and contaminate cargo. For food-grade and pharmaceutical shipments, pest contamination is a complete cargo loss event with regulatory consequences.
Dust and Debris: In arid environments and during road transport, fine dust penetrates failed seals and coats cargo. For machinery, electronics, and finished consumer goods, dust contamination can render products unsaleable.
Temperature Control Loss: In reefer containers, a failed seal allows thermal exchange between the conditioned interior and the outside environment. The refrigeration unit works harder, consumes more energy, and may fail to maintain target temperature. For temperature-sensitive pharmaceuticals and perishable foods, even a few degrees of deviation can spoil an entire shipment.
Structural Corrosion: Water penetrating through door seals does not just damage cargo — it attacks the container itself. Rust in the door frame channels, on the floor edge, and at corner castings accelerates container deterioration. Left unchecked, corrosion around the door frame can compromise the structural integrity of the entire door assembly.
The Container Owners Association reports that water damage claims from door seal failures represent nearly one-third of all cargo damage claims in intermodal shipping. For a single 40-foot container carrying high-value goods, a water damage claim can exceed US $50,000 — several orders of magnitude more than the cost of a replacement seal set.
What Does the Future Hold for Container Door Seals?
Are Smart Container Door Seals on the Horizon?
The container shipping industry is undergoing a digital transformation driven by the Internet of Things (IoT), and door seals are not excluded from this trend. Several emerging technologies point toward “smart” container seals that move beyond passive rubber barriers:
Embedded Sensor Technology: Research is underway into EPDM seals with integrated conductive pathways or embedded micro-sensors that can detect and report compression loss in real time. A sensor running the length of the seal could detect a local gap before it becomes visible to the naked eye, triggering a maintenance alert before cargo is compromised.
Cold Chain Integration: In the reefer segment, smart seals could integrate with the container’s temperature monitoring system to provide continuous seal integrity data alongside temperature logs. A seal failure during transport would be flagged immediately rather than discovered at destination.
Blockchain-Verified Integrity: For high-security and pharmaceutical shipments, a seal that records and cryptographically verifies that it maintained integrity throughout the journey adds a new layer to the chain of custody. This concept extends the familiar bolt seal from the door hardware to the door seal itself.
These technologies are still in development and face significant challenges — cost, durability of embedded electronics in harsh maritime environments, and standards harmonization among them. But the trajectory is clear: the door seal is evolving from a passive rubber strip to a potentially data-generating component of the connected container.
What Material Innovations Are Emerging?
Reclaimed and Recycled EPDM: As sustainability pressure increases across the logistics industry, manufacturers are developing EPDM compounds that incorporate recycled and reclaimed rubber content while maintaining performance specifications. Hebei Weizhong Rubber Technology, for example, has patented processes for reclaimed EPDM that offers comparable mechanical properties to virgin material at 15–20% lower cost. For large fleet operators managing thousands of containers, this cost differential is significant.
Self-Healing Elastomers: Academic and industrial research into self-healing polymers — materials that can autonomously repair micro-cracks and tears — has advanced significantly in recent years. While no self-healing container door seal is commercially available yet, the concept is compelling: a seal that heals its own ozone cracks could dramatically extend service life and reduce inspection frequency.
Advanced Co-Extrusion: Dual-durometer co-extrusion, where a single seal profile combines solid EPDM for structural retention with sponge EPDM for the compression zone, is already used in some automotive and industrial sealing applications. This approach allows engineers to optimize different parts of the same seal for different functions — rigidity where the seal sits in the channel, flexibility where it compresses against the frame.
UV-Stabilized Compounds: New generations of UV stabilizers and antioxidants are pushing the boundaries of EPDM’s already-impressive weathering resistance. These compounds target the specific degradation pathways that eventually cause surface hardening and cracking, with laboratory tests suggesting significant lifespan extensions over current industry-standard formulations.
The container door seal, despite its apparent simplicity, sits at the intersection of polymer chemistry, mechanical engineering, international logistics, and increasingly, digital technology. As the industry evolves, this humble strip of rubber will continue to receive engineering attention disproportionate to its cost — because nothing else on a container has a more direct impact on whether the cargo arrives in the same condition it departed.
Frequently Asked Questions
What are container door seals made of?
Container door seals are predominantly made from EPDM (Ethylene Propylene Diene Monomer) rubber, a synthetic elastomer chosen for its exceptional resistance to ozone, ultraviolet radiation, extreme temperatures (-40°C to +120°C), and saltwater exposure. Standard specifications include 70 ±5 Shore A hardness and approximately 10 MPa tensile strength. Some specialty seals use silicone (for extreme high-temperature applications), neoprene/chloroprene (for closed-cell sponge compression seals), or PVC/EPDM foam composites (for edge-type and bubble-type seals), but EPDM remains the industry standard for ISO shipping containers.
How do container door seals work?
Container door seals work through compression. When the container doors close and the locking bars engage, the rubber seal profile is compressed between the door panel and the door frame at roughly 25–30% of its original thickness. This creates a continuous, elastic barrier that fills the gap between metal surfaces and prevents the passage of water, air, dust, and pests. The seal sits inside a metal retaining channel and is secured by retaining strips and stainless steel rivets. The left-hand door (three-sided seal) closes first, followed by the right-hand door (four-sided seal), whose overlap plate creates the door junction seal.
What is the difference between 3-sided and 4-sided container door gaskets?
The left-hand door of an ISO container uses a three-sided gasket (top, bottom, and hinge-side edges), while the right-hand door uses a four-sided gasket (all four edges). This asymmetry exists because the right-hand door closes over the left-hand door, with an overlap plate covering the joint between them. The left door’s unsealed vertical edge is protected by this overlap plate. When you purchase a replacement gasket set, it always includes both components. This is not a defect — it is the designed configuration that enables the correct door-closing sequence.
How often should container door seals be replaced?
In coastal and high-exposure environments, container door seals should be proactively replaced every 5 to 7 years. Testing shows EPDM retains approximately 85% of its original elasticity after five years in coastal conditions. The actual replacement interval depends on climate (tropical and coastal environments accelerate degradation), usage frequency (frequent door operation increases mechanical wear), and seal quality. Reactive replacement — waiting until visible failure occurs — is more expensive than scheduled replacement because a single water damage cargo claim can exceed the cost of dozens of seal sets.
How do I know if my container door seals need replacing?
Perform the dollar bill test: close and latch the door, slide a piece of paper between the seal and frame, and try to pull it out. If the paper slides out easily without resistance, the seal is failing at that point. Other signs include: visible ozone cracking (fine parallel cracks on the surface), compression set (flat, shiny spots where the seal contacts the frame), hardening or brittleness (the rubber feels rigid rather than flexible), rust trails inside the door frame (evidence of water penetration), tears or cuts of any size, and visible light coming through closed doors.
What types of container door seals exist?
The main types are: J-type (the global standard for ISO dry cargo containers, J-shaped cross-section), C-type (C-shaped, often used on lower door sections or in JC combination sets), H-type (double-seal profile for refrigerated/reefer containers), compression type (self-adhesive closed-cell EPDM/CR sponge, common on offshore and storage containers), edge/bubble type (PVC/EPDM sponge with steel carrier, presses onto flat edges), and foam seals (closed-cell foam, used in storage and non-shipping applications).
Can I replace container door seals myself?
Yes, container door seal replacement is a manageable DIY project requiring standard tools: a utility knife, cordless drill with 3/16-inch bit, flathead screwdriver, chisel, rubber mallet, and wire brush. Materials needed include the replacement gasket set, neoprene contact cement, 4.8mm stainless steel pop rivets, acetone for channel cleaning, and optionally cyanoacrylate adhesive for corner joints. The recommended method is a hybrid approach combining adhesive in the channel with mechanical retention via retaining strips and rivets at 6-inch intervals. If the ambient temperature is below 20°C, warm the new gasket indoors for 24 hours before installation.
Can I repair a damaged container door seal instead of replacing it?
Sectional repair is possible when damage is localized and the surrounding seal is in good condition. The damaged section is cut out, replaced with new extruded J-type stock, secured with retaining strips and rivets, and joined to the existing seal using EPDM-compatible cyanoacrylate adhesive. However, repairs introduce new joint points that become potential failure locations. If the existing seal is more than five years old or shows signs of widespread ozone cracking or compression set, full replacement is the more reliable and economical choice.
What tools do I need to replace container door gaskets?
You need: a sharp utility knife, a cordless drill with 3/16-inch (4.8mm) drill bits, a flathead screwdriver, a chisel, a rubber mallet, a wire brush, clean rags, acetone or isopropyl alcohol (for degreasing), neoprene contact cement (brush-on type), stainless steel pop rivets (4.8mm x 15mm, 304-grade), replacement retaining strips (if originals are corroded), and cyanoacrylate adhesive for joining seal ends. Optionally, a rivet gun, rust converter, and work gloves make the job easier and safer.
Why are container door seals made from EPDM rubber?
EPDM dominates because of its unique combination of properties ideal for maritime environments. Its saturated polymer backbone provides outstanding resistance to ozone and UV radiation — the two primary causes of rubber degradation outdoors. It maintains flexibility and sealing performance from -40°C to +120°C, handles saltwater exposure without swelling or degrading, resists mild acids and alkalis, and offers high tensile strength (10–15 MPa) and elongation (300–600%) that withstands the repeated compression cycles of door operation. While other materials like silicone offer advantages in specific niche applications, no alternative material matches EPDM’s balance of performance, durability, and cost for general-purpose container door sealing.

 Czech Republic
 WITHOUT SHIPPING


Other container news...

Shipping container types
Roughly 80% of everything you own traveled to you inside a steel box. Shipping containers—also called cargo containers, ISO containers, or “conex” boxes—are the backbone of global trade, carrying about 90% of the world’s non-bulk cargo across oceans, rails, and highways. Yet a “shipping container” is not one single object. It is a family of specialized steel boxes, each engineered for a specific kind of cargo: some vent, some freeze, some open from the top, and some have no walls at all.

40 foot container storage uses
The 40 foot container has moved far beyond its original job of hauling cargo across the ocean. Today, the phrase “40 foot container storage uses” describes an enormous and still-growing field: everything from an extra garage behind a house to a full retail storefront, a mobile office, an indoor farm, or a temporary shelter. Because the 40 foot container is the most common size in global shipping, it is also the most abundant, the most affordable, and the most widely converted for storage and building purposes.

How tall is a 20-Foot shipping container?
A 20-foot shipping container stands 8 feet 6 inches (8′ 6″) tall on the outside, or 2.59 meters. Inside, the usable height is slightly less — roughly 7 feet 9–5/8 inches (2.39 m) — because the floor, roof panels, and corner castings consume several inches of the total height.
That is the short answer. But “how tall” hides important nuance: the number changes depending on whether you are measuring a standard unit or a high cube unit, whether you are measuring the exterior or the interior, and whether you actually need to fit something through the door opening, which is the shortest vertical dimension on the entire box.

Shipping container wheel movement kits
A shipping container wheel movement kit is a bolt-on (or twist-lock) hardware system that lets a single person attach wheels to the corner castings of a 20 ft or 40 ft shipping container and reposition it — often without a crane, forklift, or flatbed truck. Instead of hiring a heavy-haul trucker every time you want to nudge a container a few feet on your property, the right wheel kit turns a 4,000–10,000 lb steel box into something a pickup truck, skid steer, or a couple of strong backs with a come-along can move.