
How to open shipping container doors
Opening a shipping container door looks straightforward — rotate a handle, pull, and swing it open. But anyone who has stood in front of a stubborn, rusted, or misaligned cargo door knows the reality is far more complicated. Shipping container doors weigh between 60 and 100 kilograms per leaf. They rely on a multi-point locking mechanism that demands the correct sequence, the right amount of force, and an understanding of how the hardware actually works. Get it wrong, and you risk injury, damaged equipment, or a door that simply will not budge.
This guide covers everything: the anatomy of container doors, the exact step-by-step opening and closing procedure, troubleshooting stuck doors, maintenance schedules, safety protocols, and the engineering history behind why these doors work the way they do. Whether you are a first-time container renter, a warehouse operator, a truck driver, or a DIY container home builder, this is the definitive resource.
What Are the Parts of a Shipping Container Door?
Before touching a handle, you need to understand what you are operating. A shipping container door is not a simple hinged panel — it is an engineered assembly of interlocking steel components designed to withstand ocean storms, forklift impacts, and years of heavy use while keeping cargo dry and secure.

Door Leaves and Corrugated Steel Panels
Each standard shipping container has two rear door leaves — a right leaf and a left leaf, as viewed from the outside. Each leaf is a massive welded assembly: two vertical hollow-section stiles on the sides, horizontal C-section rails at the top and bottom, and infilled corrugated Corten steel paneling in between. Corten steel — also known as weathering steel — develops a protective rust-like patina that resists deeper corrosion, which is why container doors can survive decades of marine exposure.
A single door leaf on a 20-foot container weighs roughly 60–80 kg (130–175 lbs). On a 40-foot high-cube container, each leaf approaches 100 kg (220 lbs). These are heavy, and they demand respect.
Locking Rods, Cams, and Keepers
The heart of the door locking system is the vertical lock rod assembly. Each door leaf typically has two lock rods — one near the outer edge and one near the center split — running the full height of the door from top to bottom.
At each end of every lock rod, a forged steel cam is welded in place. The cam is an oval or angular lobe. When the handle rotates the rod, the cam turns and engages with a corresponding keeper — a heavy steel bracket welded to the container frame above the door header and below the door sill.
When all cams are fully rotated into their keepers, the door is locked and the rubber gaskets are compressed, forming a watertight seal. When the cams rotate out — typically beyond 90 degrees — they release the door from the frame.
Handles, Retainers, and Latches
Each lock rod has a handle — a forged steel lever that provides the mechanical advantage needed to rotate the rod against the friction of the cam-to-keeper interface. Handles are typically secured in the closed position by two mechanisms:
- Retainers: Metal brackets or clips welded to the door that hold the handle flat against the door when not in use. You must lift the handle up and out of the retainer before you can rotate it.
- Latches: Small pivoting tabs located above each handle. These serve as a secondary lock to prevent the handle from accidentally lifting out of the retainer during transit. The latch must be rotated to a vertical (unlocked) position before the handle can be moved.
Some modern containers use “easy-grip” handles with ergonomic shapes designed for operation while wearing gloves.
Hinges, Hinge Pins, and Bushings
Each door leaf is attached to the rear corner posts of the container by four or five drop-forged steel hinges — also called hinge blades. These are among the most heavily stressed components on the entire container. Each hinge allows the door to swing up to 270 degrees, meaning the door can fold flat against the container side wall.
The hinge pin — a hardened steel rod running through the knuckles of each hinge — must be perfectly aligned across all hinges on a single door. If even one pin is offset by a millimeter due to frame racking or impact damage, the entire door will bind. Some hinge designs include lubrication ports (grease nipples) or plastic bushings to reduce friction and corrosion.
Rubber Gaskets and Weather Seals
Running around the entire perimeter of each door leaf is a rubber gasket — typically made of EPDM (ethylene propylene diene monomer) rubber or silicone rubber. These gaskets feature multiple flexible fins that compress against the container frame and against the mating door leaf when the doors are closed and locked.
The gasket serves three critical functions: it prevents water ingress, it blocks dust and pests, and it provides the spring tension that keeps the cams firmly seated in their keepers. When gaskets age, harden, tear, or freeze, doors become difficult to operate — and the container is no longer weathertight.
Lock Box and Security Components
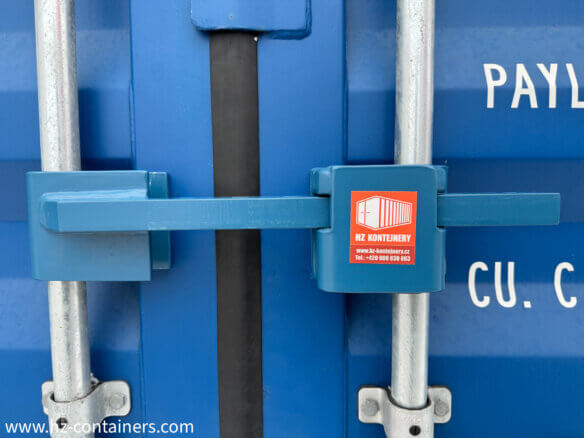
The right door leaf typically includes a lock box — a steel housing welded over the area where a padlock or disc lock secures the door. The lock box shields the padlock from bolt cutters, crowbars, and angle grinders, making it substantially harder for thieves to compromise the container. Inside the lock box, a slide bolt or hasp engages with a staple on the left door leaf.
Shipping Container Door Parts — Names, Functions, and Common Issues
| Part | Function | Common Issues |
|---|---|---|
| Door leaf (right/left) | Main closure panel; corrugated Corten steel | Dents, warping, corrosion |
| Lock rod (locking bar) | Transfers handle rotation to cams | Bending, rust seizure, misalignment |
| Cam | Oval lobe at end of lock rod; engages keeper | Wear, corrosion, deformation |
| Keeper | Bracket welded to frame; receives cam | Weld failure, corrosion, debris blockage |
| Handle | Lever for rotating lock rod | Bending from excessive force, rust |
| Retainer | Holds handle flat against door | Rust, deformation |
| Latch (safety catch) | Prevents accidental handle movement | Sticking, breakage |
| Hinge blade & pin | Pivot point for door swing | Seizure from corrosion, pin misalignment |
| Rubber gasket | Weather seal around door perimeter | Hardening, tearing, freezing, compression set |
| Lock box | Protects padlock from attack | Rust, weld failure |
| Drip edge / rain gutter | Channels water away from door top | Clogging, rust-through |
Why Do You Always Open the Right Door First?
Nearly every guide on shipping container doors emphasizes the same instruction: always open the right door first, and always close the left door first. This is not an arbitrary convention. It is built into the door design.
The Overlap Design: How the Seal Works
Look closely at the center joint where the two door leaves meet. The right door leaf has a vertical flange — a flat steel extension — that overlaps the left door leaf by approximately 20–30 millimeters. When both doors are closed and locked, the right door’s overlap flange presses against the rubber gasket on the left door, creating the primary water and air seal at the center of the doorway.
Because of this overlap, the right door physically blocks the left door from opening. If you try to open the left door first, its edge catches against the right door’s overlap flange. You can pull as hard as you want — the left door will not release. Even worse, forcing it can bend the flange, damage the gasket, or warp the door frame.
What Happens When You Try the Left Door First
When someone unfamiliar with containers attempts to open the left door first, one of two things occurs:
- Nothing. The door stays firmly shut, and the person assumes the container is jammed or broken.
- Damage. If excessive force is applied — especially with a pry bar — the overlap flange bends outward, the gasket tears, and the container loses its weathertight seal permanently.
The Closing Sequence: Why Left Closes First
The closing procedure reverses the opening logic. You close the left door first, then the right door. When the right door closes over the left, its overlap flange seats cleanly against the left door’s gasket. If you close the right door first, the left door’s edge strikes the outside of the overlap flange and cannot seal.
Open vs. Close — Correct Door Sequence
| Action | Right Door | Left Door | Why |
|---|---|---|---|
| Opening | First | Second | Right door overlaps left; must clear first |
| Closing | Second | First | Left must seat before right overlap flange engages |
| Both at once | Never | Never | Doors bind at center; risk of gasket damage and frame stress |
How Do You Open a Shipping Container Door Step by Step?
The following procedure applies to standard ISO shipping container cargo doors with dual lock rods per leaf. If your container has modified hardware — such as single-handle easy-grip systems — the principles remain the same but the number of handles differs.
Before you start: Inspect the container visually. Look for signs of cargo pressing against the doors from the inside — bulging panels, unusual gaps, or sounds of shifting contents. If cargo has shifted during transport, opening the doors could cause heavy items to fall out. Use a retaining strap wrapped around both lock rods before opening if you suspect internal pressure.
Step 1: Remove All Locks and Security Devices
If the container is secured with a padlock, disc lock (puck lock), or bolt seal, remove it now. On containers with a lock box, reach inside the housing (typically located at the center of the right door) and unlock the padlock. Slide any bolt or hasp out of its engaged position.
If the container has a customs seal or high-security bolt seal, you will need bolt cutters or a seal removal tool. Cutting a bolt seal under tension can cause it to snap back — wear safety glasses.
Step 2: Release the Right-Door Retainers and Handles
Stand facing the right door. Each lock rod handle is held flat against the door by:
- A small pivoting latch (safety catch) above the handle
- A retainer bracket that cradles the handle
For each handle:
- Rotate the latch upward to the vertical (unlocked) position.
- Lift the handle up and out of the retainer bracket. You may need to pull slightly outward as you lift.
- The handle is now free to rotate.
Step 3: Rotate the Lock Rods and Disengage the Cams
With both handles free, grip them firmly — one in each hand. Rotate both handles outward and downward simultaneously. The goal is to rotate each lock rod more than 90 degrees from its closed position.
As the rods rotate past 90 degrees, the cams at the top and bottom of each rod rotate out of their keepers. You will often feel a distinct “release” or hear a metallic clunk as the cams clear the keeper lips. This rotation past 90 degrees is what initiates the door opening — the cam lobes actually push against the keepers and force the door to begin separating from the frame.
If the handles are very stiff, switch your grip: place one hand near the top of a lock rod and the other near the bottom of the same rod, and use your body weight to rotate. Do not jerk or use sudden force — steady pressure wins.
Step 4: Pull the Right Door Open
Once both lock rods on the right door are fully rotated and the cams are disengaged, the door is mechanically free. Now:
- Grasp both vertical lock rods — one in each hand — with your hands positioned just below shoulder height.
- Position your feet: one foot slightly forward, knees slightly bent. This is an athletic stance that lets you use your leg muscles, not your lower back.
- Lean your body weight backward while pulling the rods toward you. Use your legs to drive the motion, keeping your back straight.
- As the door begins to swing open, step backward and guide the door through its arc.
If the door is heavy but moving freely, continue swinging it open until it contacts the container side wall (up to 270 degrees of rotation). Secure it with a door hook or latch if one is fitted to prevent it from swinging back in the wind.
Step 5: Repeat for the Left Door
With the right door fully open and out of the way, the left door is now unobstructed. Repeat steps 2 through 4 for the left door:
- Rotate latches upward.
- Lift handles out of retainers.
- Rotate both handles together more than 90 degrees until cams release.
- Grasp the lock rods and pull the door open using leg drive.
Key safety point: Never stand directly in front of the doors when pulling them open. Stand slightly to the side. If cargo has shifted against the doors, it can fall outward the moment the door releases. A retaining strap wrapped around the lock rods before opening is the safest practice for unknown loads.
How Do You Close a Shipping Container Door Properly?
Closing is the reverse sequence — but the order of doors is different.
Close the Left Door First
- Swing the left door toward the closed position. Ensure the door gasket is clean and free of debris.
- With the door held closed, take both lock rod handles (which should still be in the “open” position, perpendicular to the door) and press them firmly toward the container.
- As the handles approach the door face, the cams engage with the keepers. You should feel them seat. Press both handles simultaneously until they lie flat against the door.
- Rotate the latches downward to lock the handles in place.
Close the Right Door Second
- Swing the right door closed. Its overlap flange should land cleanly on the outside of the left door’s gasket.
- Repeat the handle-pressing sequence: both handles in, simultaneously, until flat against the door.
- Rotate latches down.
Lock Up
Insert your padlock through the hasp inside the lock box (for maximum security), or through the latch loops on the handles. A disc lock (puck lock) is strongly recommended over a standard padlock because its shrouded shackle resists bolt cutters.
Why Are Shipping Container Doors So Hard to Open?
When a container door will not open — or requires far more force than it should — the root cause almost always falls into one of six categories. Understanding why the door is stuck is essential before you attempt to force it.
Container Not Level — Frame Racking
This is, by a wide margin, the single most common cause of stuck container doors. Shipping containers are designed to sit on a perfectly flat, level surface — like the deck of a cargo ship or a terminal stacking yard. When placed on uneven ground, gravel, grass, or asphalt that settles over time, the container frame twists.
Even a twist of a few millimeters across the 20- or 40-foot length changes the geometry of the rear door opening from a perfect rectangle into a slight parallelogram. The door leaves, being rigid welded assemblies, no longer align with the frame. The cams miss their keepers. The hinges bind. The doors resist.
Diagnosis: Place a spirit level on the container floor near the door opening. Check both longitudinal and transverse level. Also sight along the top door header — if it is not parallel with the door leaves, the frame is racked.
Solution: Use a hydraulic bottle jack to lift the low corner(s). Insert pressure-treated lumber, concrete pavers, or steel shims under the corner casting. Re-check level. In most cases, the doors will operate normally again once the container is level.
Rust and Corrosion on Hinges and Lock Rods
Steel exposed to rain, humidity, and salt spray will rust. Hinge pins and hinge blades are especially vulnerable because they are constantly in motion and their protective coatings wear away. Rust between the pin and the blade creates friction that increases exponentially over time. Lock rods can also seize inside their guide brackets.
Diagnosis: Look for orange-brown rust deposits around hinge knuckles. Try to move the door through its range of motion — if it squeals, grinds, or moves in jerks, rust is the culprit.
Damaged or Frozen Rubber Gaskets
EPDM gaskets have a service life of roughly 10–15 years depending on climate exposure. Over time they harden, lose elasticity, and develop compression set — meaning they stay compressed in the closed position and fail to spring back when the cams release. In winter, moisture trapped between the gasket and the frame can freeze, effectively gluing the door shut.
Diagnosis: Inspect gasket fins for cracks, tears, or a flattened, glossy appearance. In freezing conditions, suspect ice adhesion.
Solution: For hardened gaskets, apply silicone spray lubricant to restore flexibility and reduce friction. For frozen gaskets, apply warm (not boiling) water or use a heat gun on low setting at a safe distance. Never force a frozen door — you will tear the gasket.
Debris in Cam Keepers and Guides
Dirt, sand, leaves, and small stones can accumulate in the cam keeper pockets, preventing the cam from fully rotating into or out of engagement. This is especially common in containers stored under trees or in dusty yards.
Diagnosis: Shine a flashlight into the keeper area. Look for compacted debris.
Solution: Clean with a stiff brush, compressed air, or a pressure washer. After cleaning, apply lubricant to prevent future buildup.
Shifted Cargo Pressing Against Doors
During transport, poorly secured cargo can slide forward and lean against the inside of the doors. The weight of the cargo keeps the cams pressed hard against the keepers, making rotation nearly impossible. This is a dangerous situation — when the door finally releases, the cargo can fall outward.
Diagnosis: Look for outward bowing of the door panels, or an unusually tight, spring-loaded feel when attempting to rotate the handles.
Solution: Use a retaining strap around both lock rods before attempting to open. If the door will not release at all, consider accessing the container through a side door (if equipped), or contact a professional with equipment to brace the load.
Bent or Warped Lock Rods
Lock rods can bend if the container sustains an impact during handling, if someone uses a crowbar or excessive leverage on the handle, or if cargo shifts forcefully against the door. A bent rod will not rotate smoothly through its guide brackets and may not align the cam with the keeper.
Diagnosis: Open the door (if possible) and sight along the lock rod. Any visible deviation from straightness is a problem.
Solution: Minor bends can sometimes be straightened with a bench vise. Severely bent rods should be replaced. Continuing to force a bent rod will damage the guide brackets and potentially warp the door frame.
Common Causes of Stuck Container Doors — Symptoms and Solutions
| Cause | Symptoms | DIY Solution | When to Call a Pro |
|---|---|---|---|
| Unlevel container (frame racking) | Doors misaligned, uneven gap, “springs back” | Jack and shim corners; re-level | Frame is visibly twisted |
| Rusted hinges/pins | Squealing, jerky movement, visible rust | Wire brush, penetrating oil, white lithium grease | Hinge pins are seized solid |
| Damaged/frozen gaskets | Door sticks at top/bottom, visible tears | Silicone spray, warm water for ice | Gasket needs full replacement |
| Debris in keepers | Handles won’t fully rotate, gritty feel | Stiff brush, compressed air, pressure wash | Keepers are rusted through |
| Shifted cargo pressure | Door panels bulge, handles feel spring-loaded | Retaining strap, careful release | Cargo is hazmat or extremely heavy |
| Bent lock rods | Rod visibly curved, binds in guides | Bench vise straightening | Rod is cracked or severely bent |
What Tools Help Open Stuck Shipping Container Doors?
The right tool makes the difference between a successful door opening and an injury. The wrong tool — particularly the crowbar — is responsible for a significant share of container-related workplace injuries, according to data from TT Club, the international freight insurance specialist.
Leverage Bars and Extension Handles
A purpose-built container door leverage bar (such as the OPNBar) provides an extended handle that slips over the container’s lock rod handle, multiplying your mechanical advantage. This lets you rotate stiff lock rods without straining your back or shoulders. Unlike improvised cheater bars (pipes slipped over handles), a proper leverage bar has a hook or notch that prevents it from slipping off under load.
How to use: Attach the leverage bar to the handle, ensure it is fully seated, and apply steady, controlled pressure. Do not jerk or bounce on the bar — this can bend the handle or rod.
Lubricants and Penetrating Oils
A can of penetrating oil belongs in every container toolkit. Apply it to hinge pins, lock rod guides, cam surfaces, and keeper pockets before attempting to open a stiff door. Let it soak for 5–10 minutes to break down rust and corrosion. Follow up with a heavier lubricant (white lithium grease or silicone spray) once the door is open, because penetrating oil alone evaporates and leaves surfaces unprotected.
Hydraulic Jacks for Leveling
A 12-ton or 20-ton hydraulic bottle jack is the right tool for lifting a sunken container corner. Place the jack on a solid base (a steel plate or thick wood block) under the corner casting. Lift slowly and check level frequently. Once level, insert permanent shims under the corner casting — never leave a container supported only by a jack.
Tools to Avoid
- Crowbars and pry bars: TT Club reports that crowbar use on container doors has caused serious injuries including fractures, lacerations, and crush injuries. A crowbar concentrates force on a small area, easily bending door flanges, tearing gaskets, or slipping and striking the operator.
- Forklift tines: Using a forklift to push or pry a door open can warp the entire door frame beyond repair. It also puts the forklift operator at risk if the door suddenly releases.
- Sledgehammers: Striking a door or lock rod with a sledgehammer transmits shock through the frame and can crack welds or permanently deform components.
Recommended Tools for Opening Stuck Container Doors
| Tool | Purpose | Safety Notes |
|---|---|---|
| Container door leverage bar | Multiply handle-turning force | Ensure secure fit; do not bounce or jerk |
| Penetrating oil (e.g., PB Blaster, Kroil) | Break down rust on hinges, cams, rods | Use in ventilated area; follow with grease |
| White lithium grease spray | Long-term hinge and rod lubrication | Apply after penetrating oil |
| Silicone spray lubricant | Gasket conditioning, freeze prevention | Safe for rubber; reapply before winter |
| Hydraulic bottle jack (12–20 ton) | Lift container corners for leveling | Always use solid base; never leave unsupported |
| Retaining strap (load strap) | Secure doors against shifted cargo | Wrap around both lock rods before opening |
| Stiff-bristle brush & compressed air | Clean debris from keepers and guides | Wear eye protection |
| Heavy-duty work gloves with grip | Hand protection and better grip on handles | Essential PPE for all door operations |
| Safety glasses | Eye protection from rust flakes, debris | Required when using penetrating sprays |
How Do You Open a Shipping Container from the Inside?
A common concern — especially among container home builders and people using containers as workshops — is whether you can open the doors from the inside. The answer is yes, but it depends on the container design and the condition of the internal hardware.
Cane Bolt and Spring Latch Mechanism
Most standard shipping containers are equipped with a cane bolt on the interior of the right door, positioned near the bottom corner. A cane bolt is a vertical steel rod with a hooked or angled handle at the top. In its locked position, the rod drops into a hole in the door sill, securing the door from the inside.
To open the door from the inside:
- Locate the cane bolt handle (usually on the lower right of the right door).
- Lift the cane bolt handle upward to disengage the rod from the sill hole.
- Rotate the handle to lock the cane bolt in the raised position.
- Push both lock rod handles outward (toward the door) to rotate the cams out of the keepers.
- Push the door open.
Internal Lock Rod Access
On the interior side of each door, the lock rods and handles are fully accessible. The internal handles are the same ones you see on the outside — they pass through the door. To open from inside, simply reverse the normal exterior operation: rotate the handles to disengage the cams, then push the doors outward.
Important caveat: If someone has placed a padlock on the exterior lock box or through the exterior handle latches, the doors cannot be opened from the inside regardless of internal hardware. This is why you should never enter a shipping container and close the doors behind you unless you are absolutely certain no external lock is in place. People have died from being locked inside containers in hot weather.
Emergency Release Options
If you are converting a container for human occupancy (home, office, workshop), building codes typically require a means of egress that does not depend on the cargo door locking mechanism. Common solutions include:
- Installing a standard personnel door (steel entry door) in the container wall
- Adding an interior panic bar or crash bar to the cargo doors
- Modifying the lock rod mechanism to include an interior-only release handle
- Never relying on the padlocked cargo door as the sole exit
What Lubricants Should You Use on Container Doors?
Lubrication is the cheapest and most effective maintenance you can perform on a shipping container. Yet it is also the most commonly neglected. A container stored outdoors should have its door hardware lubricated at least twice per year — more often in coastal, dusty, or high-use environments.
White Lithium Grease vs. Silicone Spray vs. WD-40
These three products serve different purposes, and using the wrong one can leave your doors under-protected.
- White lithium grease: A heavy-duty, water-resistant grease that stays in place and provides long-term lubrication. This is the best choice for hinge pins, lock rod guides, and cam-to-keeper contact points. It does not wash away in rain and resists high pressure. Apply with a spray can for easy access to tight spaces.
- Silicone spray lubricant: Lightweight, water-repellent, and safe for rubber. Use this on door gaskets to restore flexibility, prevent freezing in winter, and reduce friction against the door frame. Silicone spray does not attract dust or dirt, making it ideal for seal surfaces.
- WD-40 and penetrating oils: These are solvents with light lubricating properties, designed to break down rust and free stuck parts. They are excellent for the initial loosening of seized hinges or lock rods, but they are not long-term lubricants. After using WD-40 to free a stuck mechanism, always follow up with white lithium grease or silicone spray for lasting protection.
Lubricant Comparison — Best Products for Each Component
| Lubricant | Best For | Longevity | Water Resistance | Rubber-Safe |
|---|---|---|---|---|
| White lithium grease (spray) | Hinge pins, lock rod guides, cams/keepers | 6–12 months | Excellent | No |
| Silicone spray | Door gaskets, latch pivots, retainer clips | 3–6 months | Very good | Yes |
| WD-40 / penetrating oil | Initial rust breaking, seized parts | Days to weeks | Poor | No (can degrade rubber) |
| Dry PTFE lubricant (e.g., WD-40 Specialist) | Dusty environments, lock mechanisms | 3–6 months | Good | Yes |
| Marine-grade anti-seize compound | Hinge pins in coastal/salt environments | 12+ months | Excellent | No |
| Graphite powder | Keyholes, padlock mechanisms | 6–12 months | Moderate | Yes |
Where to apply lubricant on a shipping container door:
- Every hinge pin and hinge blade knuckle — top and bottom
- Lock rod guide brackets — where the rod passes through
- Cam surfaces and keeper contact faces
- Handle pivot points and retainer brackets
- Latch pivot pins (the small safety catches above handles)
- Door gasket fins — lightly coat with silicone spray
- Lock box hasp and slide bolt
Recommended schedule: Lubricate all points every 6 months. In coastal areas, increase to every 3 months. Always lubricate immediately after pressure washing the container or after heavy rain.
How Do You Prevent Shipping Container Door Injuries?
Opening a shipping container door is one of the most injury-prone activities in logistics, warehousing, and container handling. TT Club, the leading insurer of intermodal equipment, has documented a steady rise in container door-related injuries, attributing most of them to improper technique and the use of brute force when doors are stuck.
Injury Statistics and Industry Data
According to TT Club’s safety bulletins, the most common container door injuries include:
- Shoulder strains and rotator cuff tears: Caused by pulling lock rod handles from an overhead or awkward position
- Lower back strains and herniated discs: Caused by pulling with the back instead of the legs
- Crush injuries to hands and fingers: Caused by doors slamming shut or cargo falling outward
- Lacerations and fractures: Caused by crowbars slipping, or by a door coming completely off its hinges
One TT Club case study describes a worker who suffered serious injuries attempting to pry open a jammed container door with a crowbar. The crowbar slipped, and the worker fell backward onto concrete. Another case involved a 1.5-ton paper reel that rolled out of a container when the doors were opened, fatally injuring a stevedore.
Proper Lifting Technique and Body Mechanics
The correct posture for pulling open a container door is not intuitive. The natural impulse — standing directly in front, grabbing one handle, and yanking backward — puts maximum strain on the lower back and shoulders.
Correct technique:
- Stand with your feet shoulder-width apart, one foot slightly ahead of the other.
- Position your hands on the lock rods (not the handles, once cams are disengaged), at a height between your waist and shoulders.
- Keep your back straight and your core engaged.
- Lean your body weight backward while bending your knees — let your leg muscles (quadriceps and glutes) do the work.
- Pull steadily, not suddenly. Sudden force increases injury risk and can cause you to lose balance when the door releases.
If the handles are above shoulder height (common when the container is on a trailer or chassis), use a leverage bar or wait until the container is ground-level. Working with handles above shoulder height dramatically increases the risk of rotator cuff injury.
PPE Requirements
Minimum personal protective equipment for opening container doors:
- Heavy-duty work gloves with grip: Protect hands from sharp edges, pinch points, and rust
- Safety glasses or goggles: Protect eyes from rust flakes, debris, and spray lubricants
- Steel-toe safety boots: Protect feet if the door swings unexpectedly or cargo falls
- High-visibility vest or clothing: Required in any operational yard or terminal
Cargo Shift Awareness and Retaining Straps
Before opening any container door:
- Look for visual signs of cargo shift — bulging panels, uneven door gaps, or the sound of loose items shifting when you knock on the door.
- If you suspect cargo pressure, wrap a heavy-duty load strap around both lock rods before touching the handles. The strap keeps the doors from flying open when the cams release.
- Open the doors slowly. Stand to the side, not in front.
- Once the doors are cracked open, pause and assess before swinging them fully.
What Is the History of Shipping Container Door Design?
The shipping container door as we know it today is a product of one of the most transformative innovations in global trade history — and the door design was an essential piece of making that innovation work.
From Break-Bulk to the Intermodal Container
Before the 1950s, cargo was shipped “break-bulk” — individual crates, barrels, and sacks loaded and unloaded by longshoremen, piece by piece. A single ship might take a week to load and another week to unload. Cargo theft was rampant. Goods were exposed to weather at every stage.
In 1956, Malcolm McLean, a trucking entrepreneur from North Carolina, launched the first container ship — the Ideal X — carrying 58 aluminum truck trailers from Newark to Houston. The idea was simple but revolutionary: load goods into a standardized box at the factory, transport that box by truck, train, and ship without ever opening it until it reached the final destination.
ISO 668 and the Standardization of Container Doors
McLean’s early containers came in various sizes, which limited interoperability. In 1968, the International Organization for Standardization published ISO 668, which defined the external dimensions, corner casting positions, and minimum door opening sizes for Series 1 freight containers. This standard — updated through multiple revisions to the current ISO 668:2020 — is why a container from China fits perfectly on a chassis in Germany and stacks securely on a ship in Panama.
The door design was standardized as part of this process. Key requirements included:
- Double-leaf doors at one end: Providing full-width access
- Cam-and-keeper locking system: Ensuring a weathertight seal without external fasteners that could fail at sea
- 270-degree hinge swing: Allowing doors to fold flat against container sides for loading dock operations
- Overlap seal design: The right-over-left overlap that determines the opening and closing sequence
- Corten steel construction: For corrosion resistance without ongoing painting requirements
How Door Design Evolved
Early container doors used simpler latch mechanisms. The introduction of the cam-and-keeper system, with its rotating lock rods, was a major advance — it allowed a single operator to compress the door gasket evenly across all four corners simultaneously, creating a reliable watertight seal. Modular door hardware made it possible to replace individual components (handles, rods, cams, keepers) without replacing the entire door.
Security evolved too. The lock box — a welded steel shroud protecting the padlock — became standard as cargo theft grew more sophisticated. Modern containers increasingly feature integrated electronic seals and GPS tracking, though the fundamental mechanical door design has remained largely unchanged since the 1970s.
The genius of the design is its simplicity: no motors, no electronics, no pneumatic systems. Just steel, leverage, and sequenced mechanical engagement. A well-maintained container door will operate reliably for decades with nothing more than periodic lubrication and level ground.
Frequently Asked Questions
What is the correct way to open shipping container doors?
Always open the right door first (as viewed from outside). Release the safety latches, lift the handles out of their retainers, rotate both lock rods more than 90 degrees to disengage the cams from the keepers, then pull the door open using your leg muscles — not your back. Once the right door is fully open, repeat the process for the left door.
Why is my shipping container door stuck?
The most common cause is an unlevel container — when the ground settles unevenly, the frame twists and the doors no longer align with the opening. Other causes include rusted hinge pins, hardened or frozen rubber gaskets, debris packed into the cam keepers, cargo pressing against the inside of the doors, and bent lock rods. Check the container’s level first before applying force.
Which door do you open first on a shipping container — left or right?
The right door opens first. The right door’s vertical flange overlaps the left door, so you must open the right door before the left door can move. When closing, reverse the sequence: close the left door first, then the right door.
How do you close shipping container doors properly?
Close the left door first. Hold it in place and press both lock rod handles inward simultaneously until the cams seat in the keepers and the handles lie flat against the door. Lock the safety latches down. Then close the right door so its overlap flange seats over the left door’s gasket, and repeat the handle-pressing sequence. Finally, install your padlock — ideally inside the lock box.
Can a shipping container be opened from the inside?
Yes, provided no external padlock is in place. Most containers have a cane bolt on the interior of the right door that you lift to disengage from the sill. The lock rod handles are accessible from the inside, allowing you to rotate the cams and push the doors open. Never enter a container and close the doors behind you unless you are certain there is no external lock.
What tools do I need to open a stuck shipping container?
A container door leverage bar (for multiplying handle force), penetrating oil (to break rust), white lithium grease (for long-term lubrication), a hydraulic bottle jack (for leveling), and a retaining strap (to secure doors against shifted cargo). Do not use crowbars, forklift tines, or sledgehammers — these cause damage and are responsible for many injuries.
Why are shipping container doors so hard to open?
The primary reason is that the container is not on level ground, causing the frame to rack and the door to bind in its opening. Other reasons include lack of lubrication, rust, debris, and door gaskets that have become hard or frozen. A container sitting level on a concrete pad with properly lubricated hardware should open with moderate effort.
How do you lubricate shipping container door hinges?
Apply white lithium grease spray to each hinge pin and blade interface — top and bottom of every hinge. Work the door back and forth to distribute the grease. For stuck hinges, apply penetrating oil first, let it soak for 5–10 minutes, work the door, then follow with white lithium grease for lasting protection. Lubricate at least twice per year.
What are the parts of a shipping container door called?
The main components are: door leaves (corrugated steel panels), lock rods (vertical steel bars), cams (oval lobes at rod ends), keepers (brackets that receive cams), handles (levers for rotating rods), retainers (brackets holding handles flat), latches (safety catches above handles), hinges and hinge pins, rubber gaskets (weather seals), and the lock box (padlock housing).
How can I prevent shipping container door injuries?
Use proper body mechanics: pull with your legs, not your back. Keep handles between waist and shoulder height. Wear gloves and safety glasses. Never use crowbars or sudden jerking force. Before opening, inspect for signs of shifted cargo and use a retaining strap if needed. Stand to the side of the doors, not directly in front. Lubricate hardware regularly so doors do not become stuck in the first place.
 Czech Republic
 WITHOUT SHIPPING


Other container news...

Obligation to Check Tightness When Selling a Reefer Container
Who is responsible for the refrigerant leak check when selling a refrigerated container? Find out what obligations the seller has at the time of handover and why they must provide a PTI report along with the technical data plate. Learn which regulatory requirements and F-gas record-keeping duties become the sole responsibility of the new owner.

New shipping containers
If you are currently considering purchasing a new shipping container, you are not alone. While just twenty years ago containers were used almost exclusively for maritime transport, today they have found their way into construction, storage, business, and even housing. This growing popularity brings with it a host of questions: Which type should you choose? How much does it cost? How do you recognize quality? How can you avoid falling victim to scammers?
New sea shipping containers
If you are currently considering purchasing a new shipping container, you are not alone. While just twenty years ago containers were used almost exclusively for maritime transport, today they have found their way into construction, storage, business, and even housing. This growing popularity brings with it a host of questions: Which type should you choose? How much does it cost? How do you recognize quality? How can you avoid falling victim to scammers?

6m shipping container
Are you thinking about buying a 6-meter shipping container but aren’t sure what to look for? You are not alone—this 20-foot container is the best-selling size on the Czech market, and the differences between various types, conditions, and prices can be significant. In this guide, you will find everything you need to know: from exact dimensions and a comparison of categories (such as “one-way,” refurbished, and “Cargo Worthy”) to current prices and shipping advice.